The following steps must be applied before you proceed with the display installation in Step 2.
We recommend you to prepare some thermal paste and isopropyl alcohol during the installation process as you may need to reapply thermal paste to the processor once assembling.
We strongly suggest to turn on your Steam Deck and allow the battery to discharge below 25% before starting the repair. A charged lithium-ion polymer battery can be dangerous if accidentally punctured.
As an extra precaution, we suggest to put your Steam Deck into battery storage mode within the BIOS settings before starting any internal repairs.
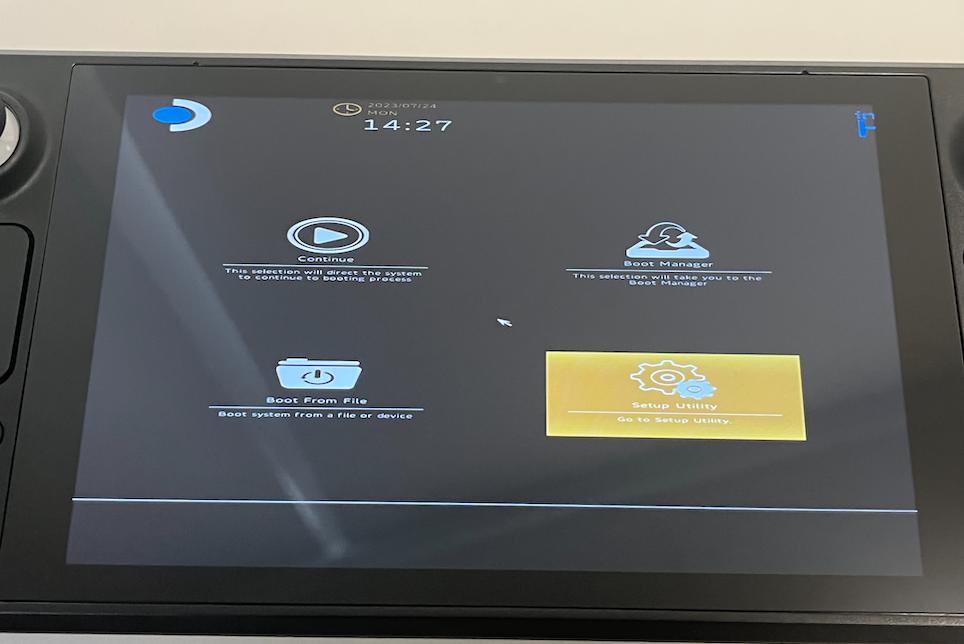
a) Hold the volume up button and press the power button simultaneously to access the Steam Deck BIOS menu. Release both volume up and power button once you hear the boot chime
b) Once the BIOS menu appears, use the arrow keys and navigate to the Setup Utility option and enter it by pressing the A button
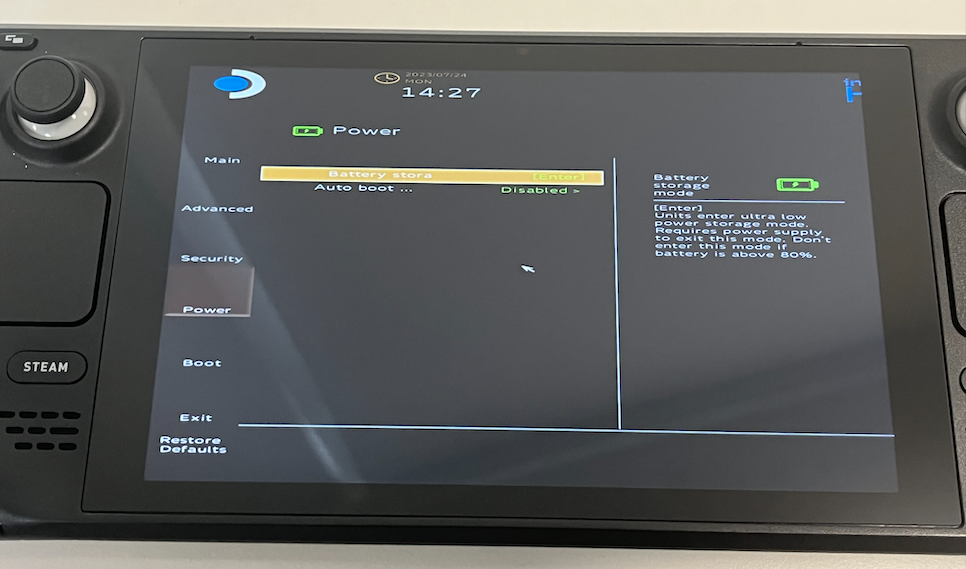
c) Use the downward arrow and navigate to the side menu option: Power
d) Press the right arrow key to navigate to the first option in the Power menu: Battery Storage Mode
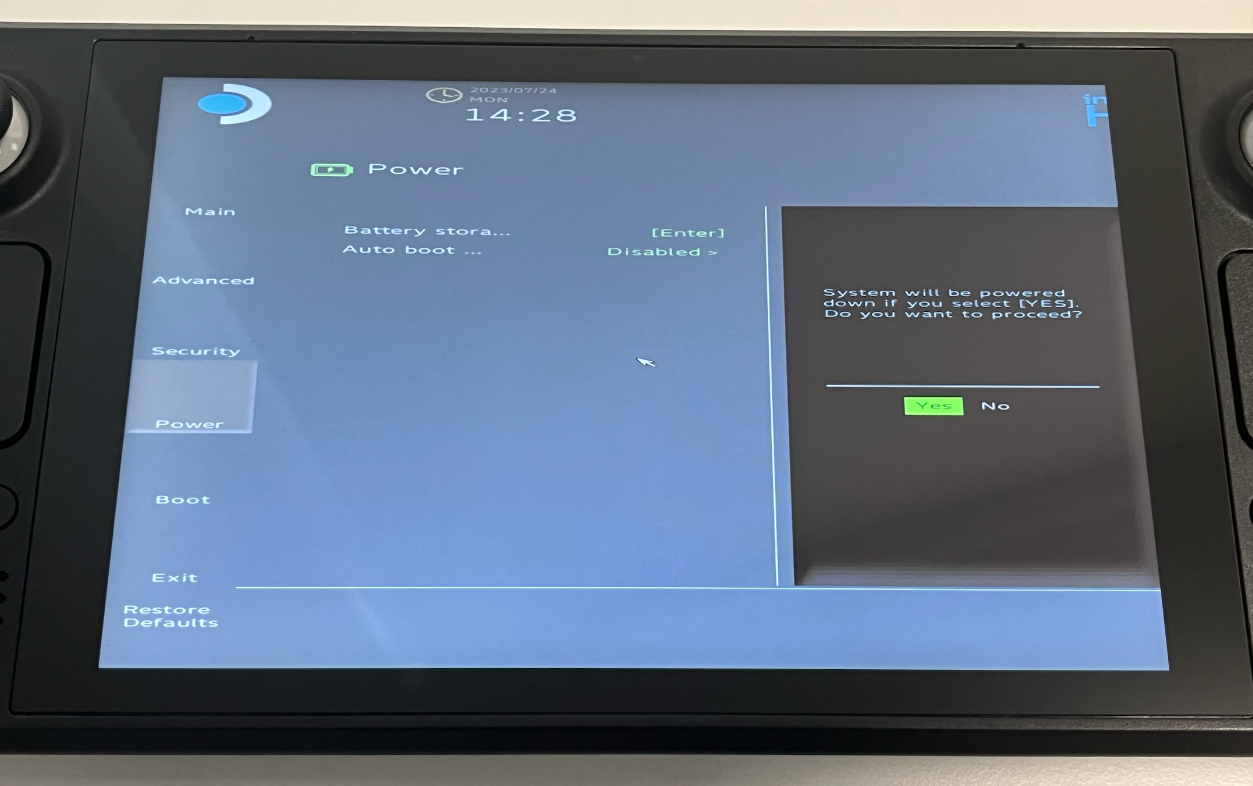
e) When you press A, a pop up will appear to ask if you want to want to power down your Steam Deck, select Yes
f) Your Steam Deck should power down and the LED next to the power button should blink three times. This means your Steam Deck is in Battery Storage Mode and you may proceed with the next steps. Note, to switch on your Steam Deck again, you will need to connect it with a charger, any presses against the power button from now on will not bootup.
Power down your Steam Deck and unplug any cables.
If you have a microSD card installed, remove it before opening the Steam Deck. Leaving it in place while removing the back cover could cause it to snap.
During the repair, consider laying the Steam Deck face-down into its case to protect the thumbsticks and prevent wobbling.